Building Skeleton screen using React Native
When you are focusing on increasing the user experience of your app, you cannot forget the context of the skeleton screen. When your user is waiting for the app to open completely, skeleton screens play a crucial role. With the display of such skeleton screens, your users can be ensured that the main content is loading. Confused? Don’t worry, the current blog curated by the experts of react native app development company will explain the concept of skeleton screens and how you can build a skeleton screen in your React Native app.
Thank you for reading this post, don't forget to subscribe!If you are thinking that this blog will only provide theoretical insight on skeleton screens, then you are wrong. I will give you complete code snippets and detailed explanations using which you can create skeleton screens on your own.
Define Skeleton Screen
You can refer to the Skeleton Screen as a placeholder. But what Placeholder? A Placeholder that is embedded in a web page and app to display the layout of both the app and web page till the complete content of the same appears before app or webpage users.
What is the utility of a Skeleton Screen?
Skeleton screens are of much importance, with these screens integrated into your app will allow you to enhance the UX of the app. In line with this, it is important, particularly for those web pages or apps which are heavy in content. Such that it has numerous image and text objects. With a Skeleton screen, you can also make your loading or skeleton screen more interesting. The users can get prompt feedback on whether the app screen is loading or not. It is much better than a black or empty loading screen. Right?
If you are associating a loading screen with a Skeleton Screen, then don’t. These are different. You can check one of my articles on loading screens and get a clear understanding of the same.
What are the types of Skeleton Screens?
There are two categories of Skeleton Screens. One of which is the placeholder or the Skeleton screen where the content layout is only grey in color. You can call such Skeleton Screens Content Wireframes. Here, you don’t need to use any unique color for the layout. Some of its examples include the web page of Facebook, Google Drive, GitHub, LinkedIn, and others. You can see the grey skeleton Screen when the app content of any of these above-mentioned platforms takes time to load.
The other category is the Color Wireframes. Here, the layout is (unique) color dominant. Although creating such a Color Wireframe takes a lot of effort, it looks better than the Content Wireframes. You can see such a type of Skeleton Screen on Pinterest.
What else can you consider other than Skeleton Screens?
You can go for a boring progressive bar and spinner. However, these may not be useful and will affect the user experience of your app. In this context, the Skeleton Screen is anyway effective as users can be familiar with the content layout they are going to visualize after the complete app or webpage loads.
Prior-required Parameters
- Set up your system. For this, you have to install software such as Node.js, Android Studio, preferably Code editor, and others. Here, I have used Visual Studio Code editor. You can choose the same. If you are stuck with the steps of getting the React Native environment installed in your system, you have to check the linked tutorial blog.
- Next, you have to learn how to create a fundamental React Native app. From the attached blog, you can learn the detailed steps.
Now, let’s see the codebase of the current project. Create two folders namely Skeleton.js and CardSkeleton.js in your app directory. Also, you have to create a codebase in the App.js folders. Let’s see how you can execute all the processes.
Creating the CardSkeleton.js
Open the code editor from your project and build a folder ‘SKELETON’. In this folder, you have to create the file CardSkeleton.js.
First get all the components mentioned in the code snippet (Image 1). Image 1

Besides the native components, you have to install a third-party package react-native-linear-gradient’ using the command npm install react-native-linear-gradient –save. After installing the package, you can import the LinearGradient component from the same package and use it in the CardSkeleton.js file. Now, consider the following snippet (image 2).

Image 2
Here, the code has created a new Animated.Value object. It has an initial value of 0. Then it shows the use of useEffect. It is to design an animation that loops forever. It is timed for 1 second with a duration of 1000 milliseconds. Also, it uses to ease the function.
TheEasing.linear.inOut code creates an AnimatedLG component. This is to animate the gradient in the card’s background color from left to right over time (from 0% opacity to 100% opacity).
The CardSkeleton component is used for animating height and width properties on cards so they can grow or shrink depending on their content (if there are more images than text).
Consider the below-given snippet. (image 3)
 Image 3
AnimatedValue is used to design the translateX variable. Here, the outputRange is set as the screen’s width. Also, the animatedValue is interpolated between 0 and 1.
The translateX value is -width whenever the animatedValue is at 0.

Now, you have to add the following code snippet. (Refer to image 3)
Image 3
As you can see, I have exported the CardSkeleton component. You have to imitate the same step. With this, you can use the same component in another file of this project.
However, before that, you have to design the screen (View object) with backgroundColor, borderRadius, height, width, and overflow.
The Animated LinearGradient (AnimatedLG) component has four colors. Consider the four color codes added to AnimatedLG. The animation starts from the range x:0,y:0 and ends at x:1,y:0.
The absoluteFill object is used with StyleSheet to direct the elements to fill the entire available space.
Now, you are creating the first file. Move ahead with the second file, MainSkelton.js.
Framing the MainSkeleton.js file

Import the needed components mentioned in the code snippet, image 4.

Image 4
Now, hold the CardSkeleton component under the ScrollView component. Here, you have to add some inline styling objects such as flex, padding, backgroundColor, marginVertical, height, width, borderRadius, and marginLeft. Here, using this codebase, you have to create multiple CardSkeleton objects for the Skeleton screen. This is the first element. Refer to image 5
Image 5
Similarly, create other CardSkeleton components as shown in image 6.

Image 6
Add some more View style for the CardSkeleton element. You can do this as presented in image 7.

Image 7
Now, the last file App.js is remaining.
Creating the App.js file
This is the main file. Also, you need to take much effort to create this file.
First, get the required components. Refer to image 8.
Image 8

Now, use the View component to render the MainSkeleton component created in the previous file. You can do this as shown in image 8.
Image 8
You can use the StyleSheet to take the codebase further. This is how you can do it.
Image 9

And it is completed.
How to test the app or the Skeleton Screen interface?
Run commands: npm install and npx react-native run-android. Note that you have to run these two commands in your app terminal. Once the bundling is done and the emulator starts, you will get a screen as shown in image 10.
Image 10
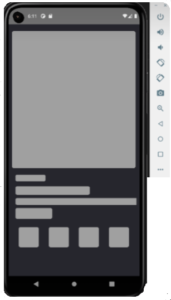
Congratulations!! You have made the Skeleton Screen interface in your React Native app. See you can design such an interesting Skeleton Screen with some steps and codebase.